一文简述,通过公众号api接口发表文章
某次在站内更新下资源,期望能自动触发更新公众号,便有了这个需求。
查了下资料和文档,整了一个,记录分享下。
(对流程不感兴趣,只想代码的,直接拖到最后有代码)
准备前工作
1 开通开发配置
在公众号后台的「设置与开发」-「基本配置」,启用“开发者密码”,获取到AppID和AppSecret。
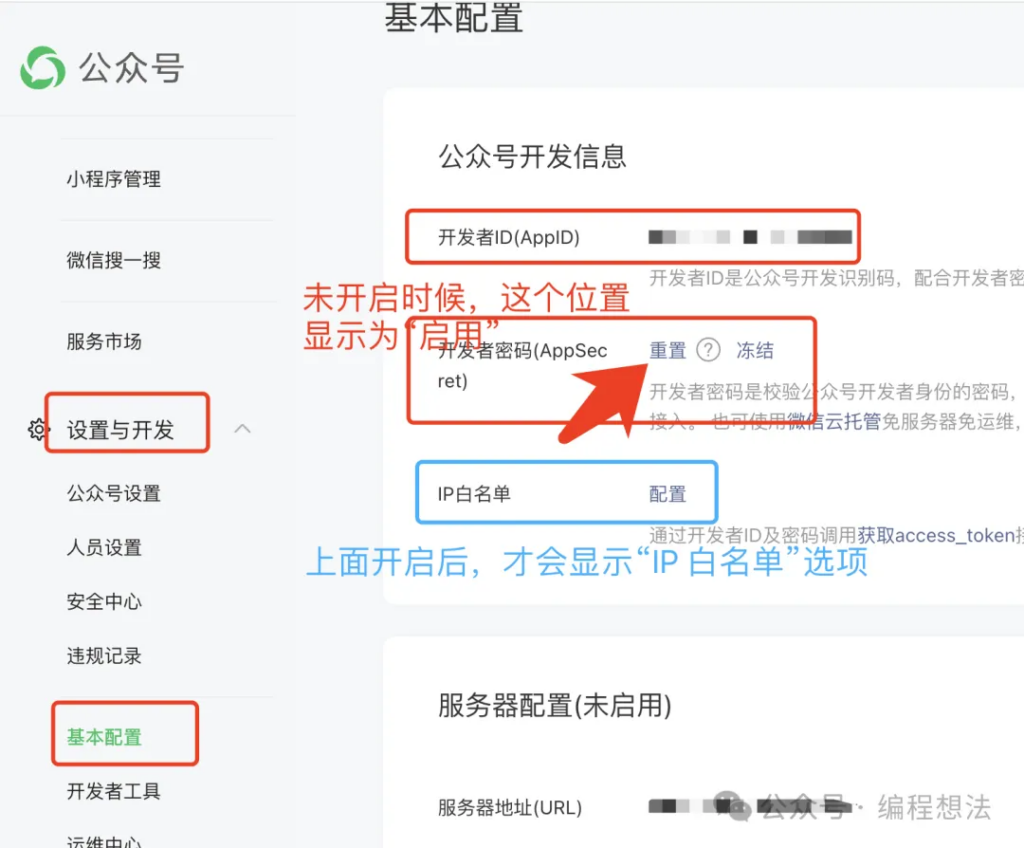
2 配置IP 白名单
在公众号后台的「设置与开发」-「基本配置」,“IP白名单”设置即可,把你的ip(执行api调用的机器ip)添加进去。
没有添加,发起请求会 “errcode: 40164,errmsg: invalid ip”。
接口封装
发布文章一共就四步:获取token、上传封面、保持草稿、发布。
1 获取token
几乎所有的接口都用token做身份认证的,接口功能调用的第一步。
参考文档:https://developers.weixin.qq.com/doc/offiaccount/Basic_Information/Get_access_token.html
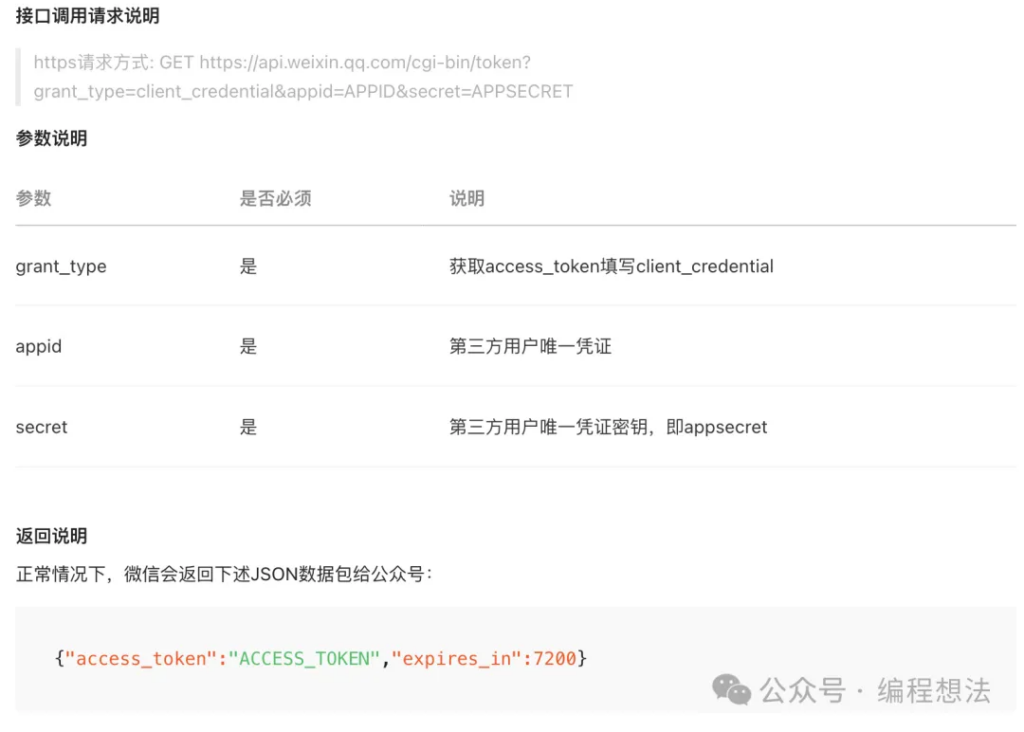
调用接口为:
https://api.weixin.qq.com/cgi-bin/token?grant_type=client_credential&appid={yourappid}&secret={yoursecret}用postman来做请求测试:
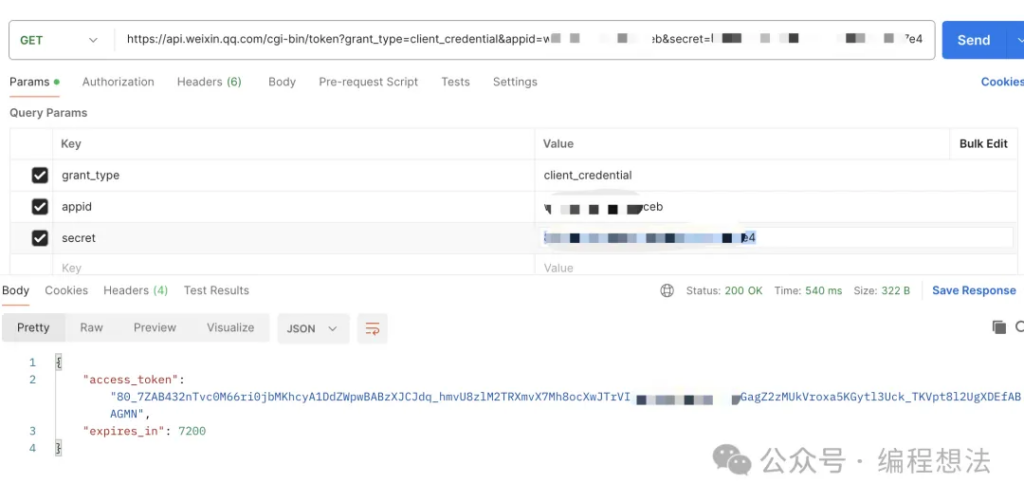
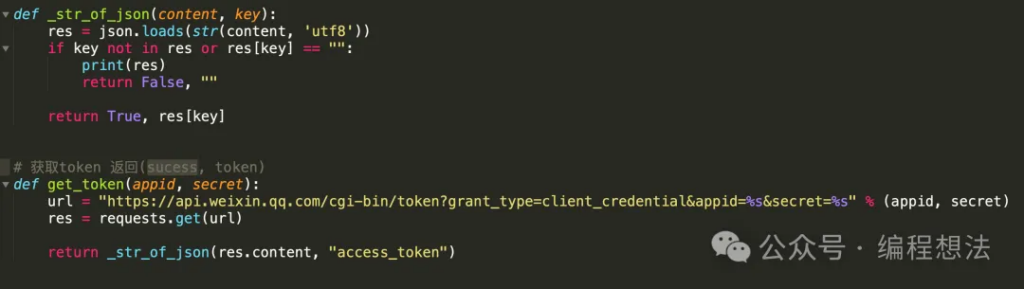
代码:(去除了日志信息,下同)
2 新增一个永久素材
主要是后面的操作,需要一个图片作为封面,所以需要提前上传一个图片资源,对应的接口就是“新增永久素材”了。
参考文档:
https://developers.weixin.qq.com/doc/offiaccount/Asset_Management/Adding_Permanent_Assets.html
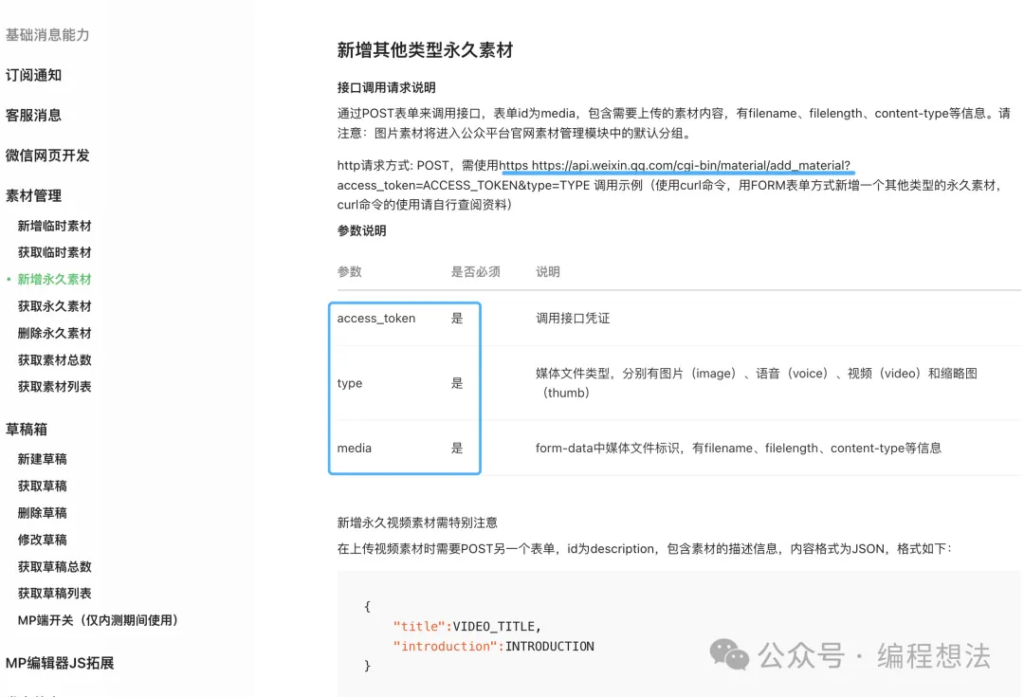
调用接口:
https://api.weixin.qq.com/cgi-bin/material/add_material?access_token={access_token}&type=image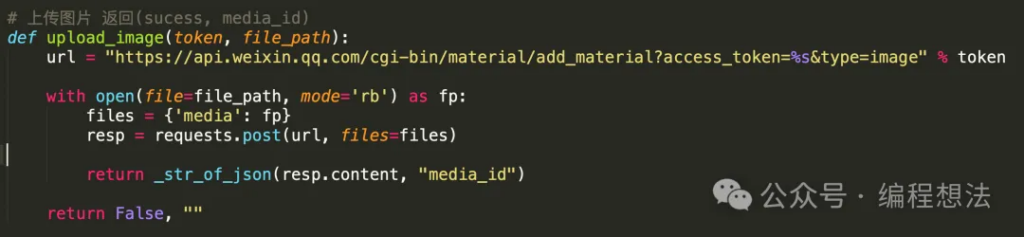
注意:如果多次发布文章,使用同样的封面,则可以先调用这个接口,把media_id 保存下来,之后这步就不是必要的了,后面新建草稿时候,直接用写定的media_id就可。
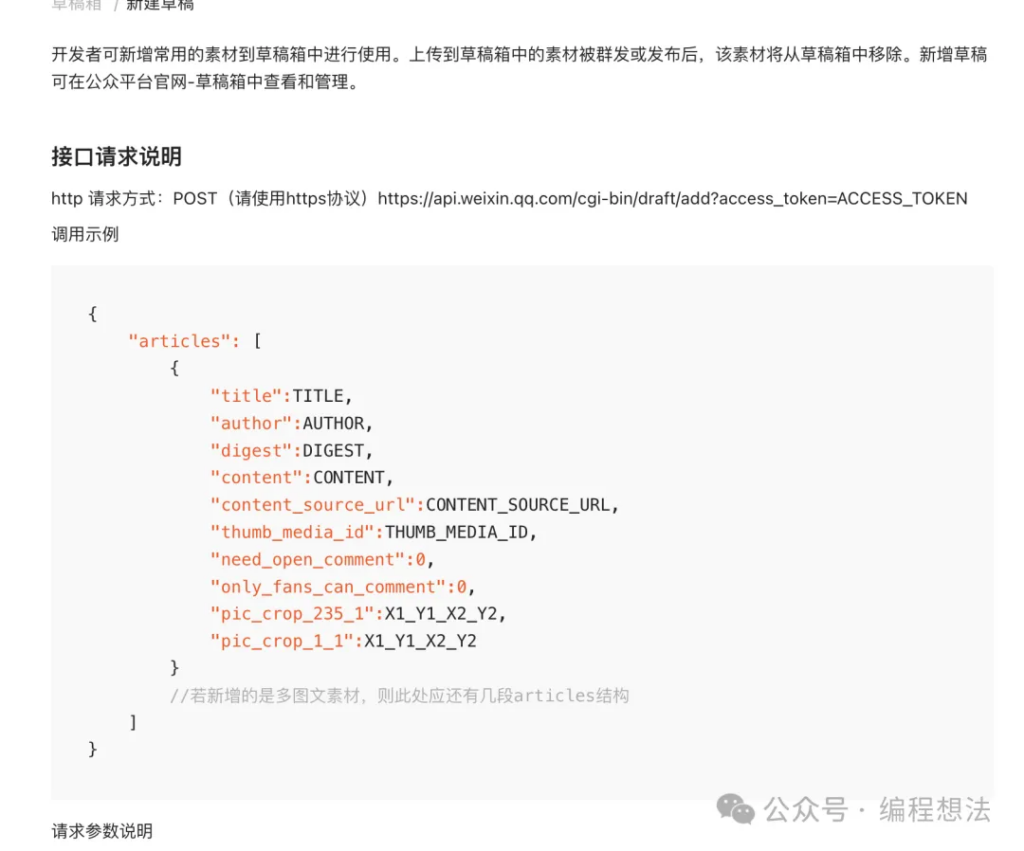
3 新建草稿
参考文档:https://developers.weixin.qq.com/doc/offiaccount/Draft_Box/Add_draft.html
调用接口:
https://api.weixin.qq.com/cgi-bin/draft/add?access_token={access_token}填上我们关注的必填选就可,需要填写的不多。
代码:
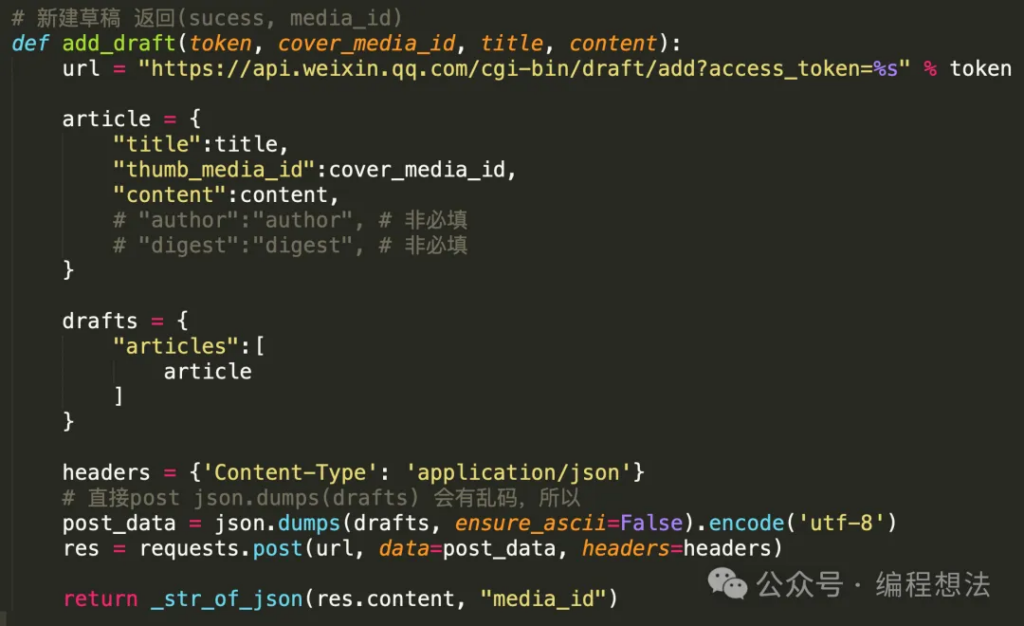
注意:如果发布后,内容有乱码,如
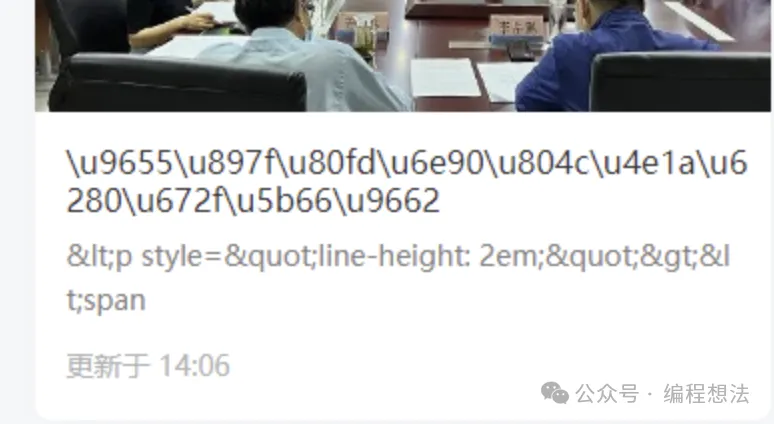
那是编码问题,构造json 数据时候,ensure_ascii 用false。
上例是python代码,如果json.dumps(drafts)会出错,需要改为:json.dumps(drafts, ensure_ascii=False).encode(‘utf-8’) 。
其他语言也有对应的设置方法。
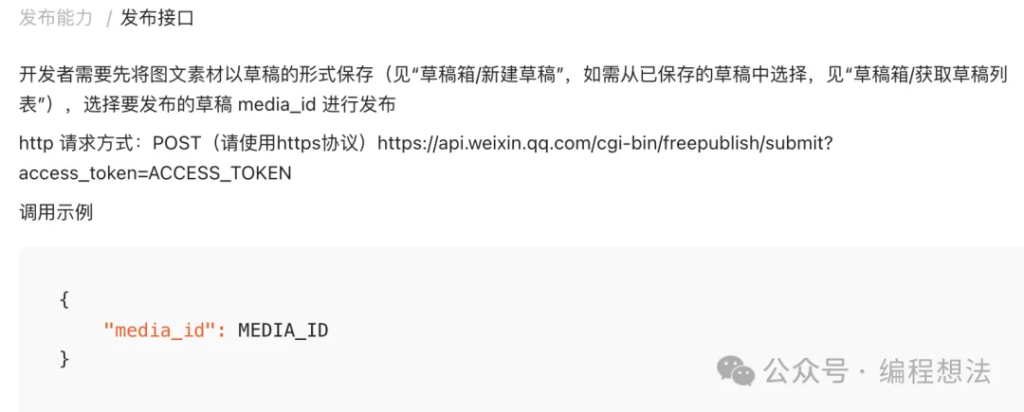
4 发布接口
最后一步就是发布了,这个接口最为简单。直接把前面的增加草稿返回的media_id 提交下就可。
参考文档:https://developers.weixin.qq.com/doc/offiaccount/Publish/Publish.html
调用接口:
https://api.weixin.qq.com/cgi-bin/freepublish/submit?access_token={access_token}代码:

5 其他
这步不是必要的,不关注发布状态的就可以无视。
由于发布文章是异步的,同时发布后的文章可能还被内容审核啥的,所以发布后的文章,可以通过publish_id 去请求“发布状态轮询接口”接口查询状态。
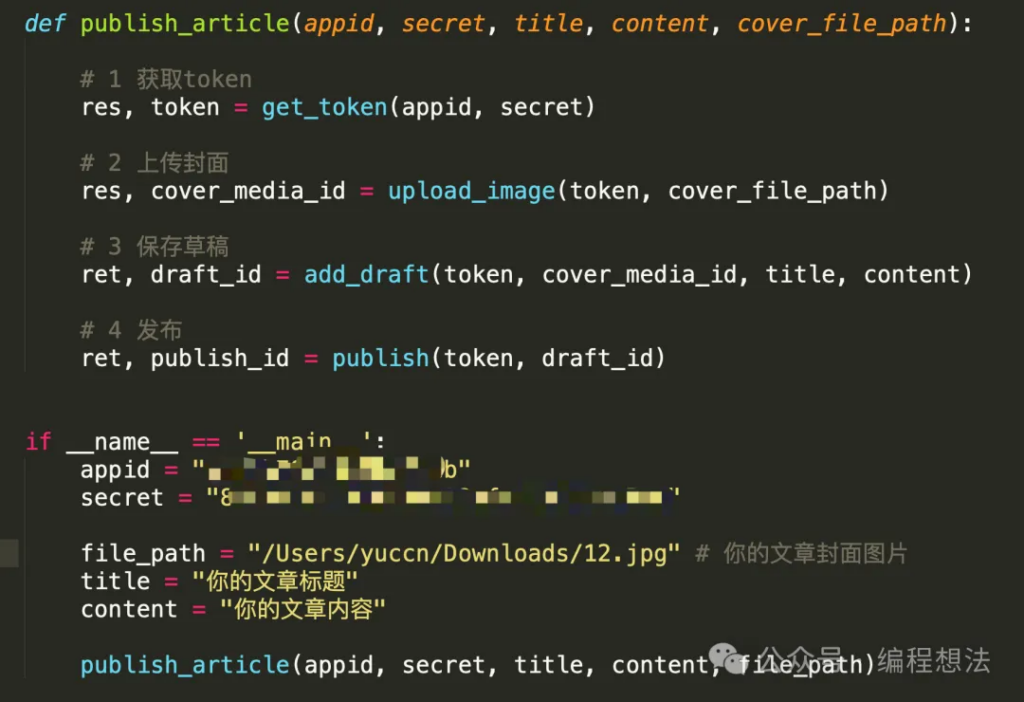
整合发表功能
基本函数封装好之后,发表文章就是一步到位了:
特别提醒:
现在公众号是推荐制度,测试结果:通过api发布的文章,不会触发微信系统推荐,也不会在主页,可用于菜单或者链接分享方式给用户阅读。
完整代码:
#-*- coding: UTF-8 -*-

import json
import os
import requests

def _str_of_json(content, key):
    res = json.loads(str(content, 'utf8'))
    if key not in res or res[key] == "":
        print(res)
        return False, ""

    return True, res[key]


# 获取token 返回(sucess, token)
def get_token(appid, secret):
    url = "https://api.weixin.qq.com/cgi-bin/token?grant_type=client_credential&appid=%s&secret=%s" % (appid, secret)
    res = requests.get(url)

    return _str_of_json(res.content, "access_token")


# 上传图片 返回(sucess, media_id)
def upload_image(token, file_path):
    url = "https://api.weixin.qq.com/cgi-bin/material/add_material?access_token=%s&type=image" % token

    with open(file=file_path, mode='rb') as fp:
        files = {'media': fp}
        resp = requests.post(url, files=files)

        return _str_of_json(resp.content, "media_id")

    return False, ""


# 新建草稿 返回(sucess, media_id)
def add_draft(token, cover_media_id, title, content):
    url = "https://api.weixin.qq.com/cgi-bin/draft/add?access_token=%s" % token

    article = {
        "title":title,
        "thumb_media_id":cover_media_id,
        "content":content,
        # "author":"author", # 非必填
        # "digest":"digest", # 非必填
    }

    drafts = {
        "articles":[
            article
        ]
    }

    headers = {'Content-Type': 'application/json'}
    # 直接post json.dumps(drafts) 会有乱码,所以
    post_data = json.dumps(drafts, ensure_ascii=False).encode('utf-8')
    res = requests.post(url, data=post_data, headers=headers)

    return _str_of_json(res.content, "media_id")

# 发布,返回(sucess, publish_id)
def publish(token, draft_id):
    url = "https://api.weixin.qq.com/cgi-bin/freepublish/submit?access_token=%s" % token
    res = requests.post(url, json={"media_id":draft_id})

    return _str_of_json(res.content, "publish_id")


def publish_article(appid, secret, title, content, cover_file_path):

    # 1 获取token
    res, token = get_token(appid, secret)

    # 2 上传封面
    res, cover_media_id = upload_image(token, cover_file_path)

    # 3 保存草稿
    ret, draft_id = add_draft(token, cover_media_id, title, content)

    # 4 发布
    ret, publish_id = publish(token, draft_id)


if __name__ == '__main__':
    appid = "wx000000000000" # 你的 appid
    secret = "xxxxxxxxxxxxxxx" # 你的 secret

    file_path = "/Users/xxx/yyyy.jpg" # 你的文章封面图片
    title = "你的文章标题"
    content = "你的文章内容"

    publish_article(appid, secret, title, content, file_path)
(全文完)
(欢迎转载本站文章,但请注明作者和出处 编程想法 – Yuccn )
4 thoughts on “一文简述,通过公众号api接口发表文章”
API发布的文章不能被推荐吗?
如果这样的话,那市面上的工具发布文章都没有阅读量了?因为很多人都是用软件发布的
没有深究,我测试API 发的,没有推荐,在公众号文章历史,也看不到。
我一直是通过发布,拿到文章链接,之后作为号的自动回复链接用
请教一下,除了获取token的另外几个api,是不是只能通过认证的号才可以调用?
不用,只要开发者配置接口启用了就可。不一定需要认证